Blender implementation
Initial setup
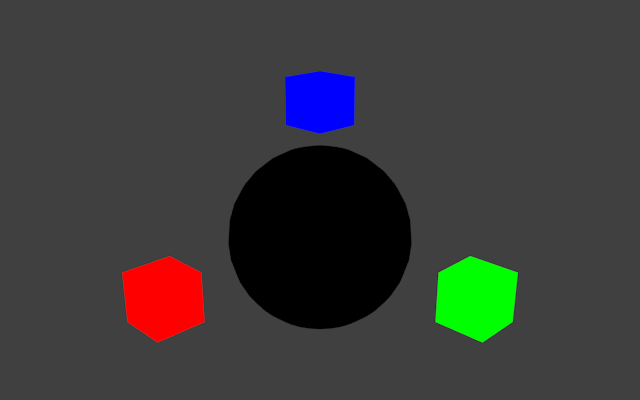
First a simple scene is created consisting of a sphere and three cubes.
The sphere represents an arbitrary solid object, and the three small cubes
represent lights.
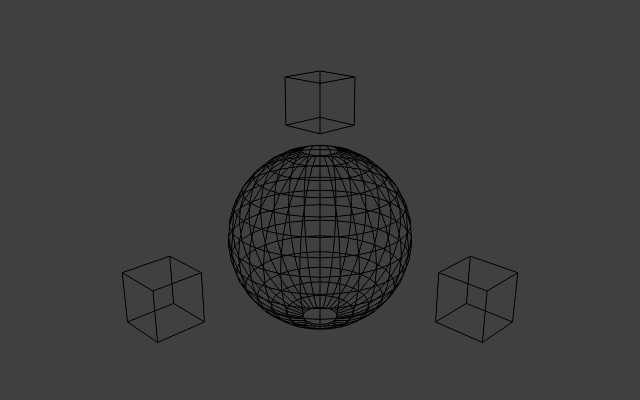
Naturally, without any real lights in the scene, the rendered scene is
unimpressive:
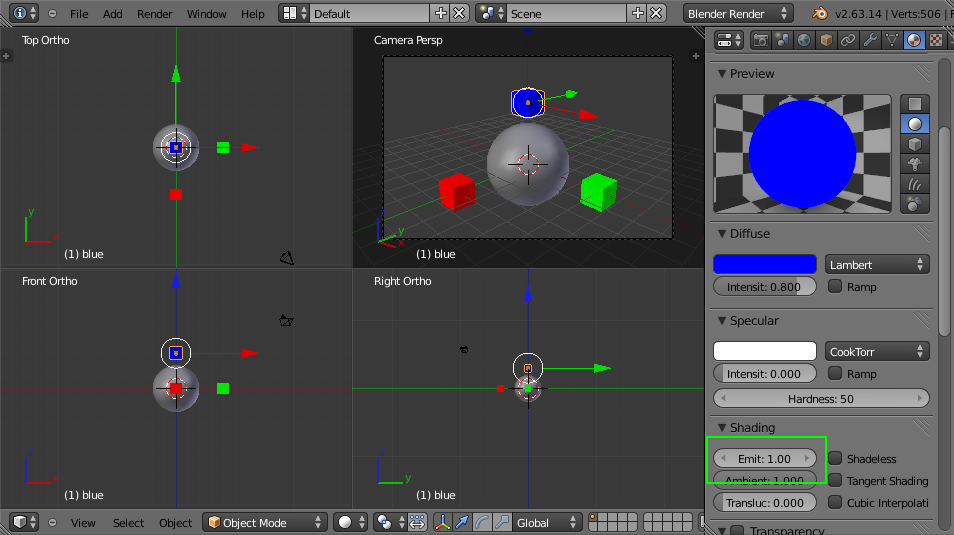
The first step is to mark each light object as "emissive". An object with
an emissive level of 0.5 will always be
drawn at at least 0.5 brightness, regardless
of any shadows or other lack of light. This is usually how, for example, luminous
tube lights and neon signs are modelled. In Blender, the emissive
level is part of an object's material. In OpenGL, the emissive level can
be stored per object or per vertex. For each of the small "light" cubes,
an emissive material is created:
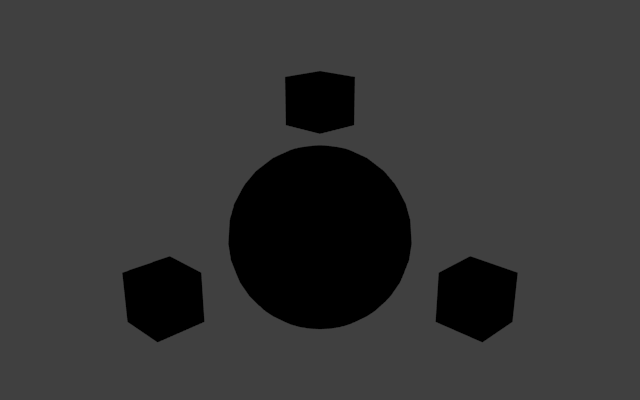
Rendering the scene demonstrates how the objects are effectively unaffected
by the lack of light. Note that emissive textures do not actually emit light -
they simply control how the object is shaded.
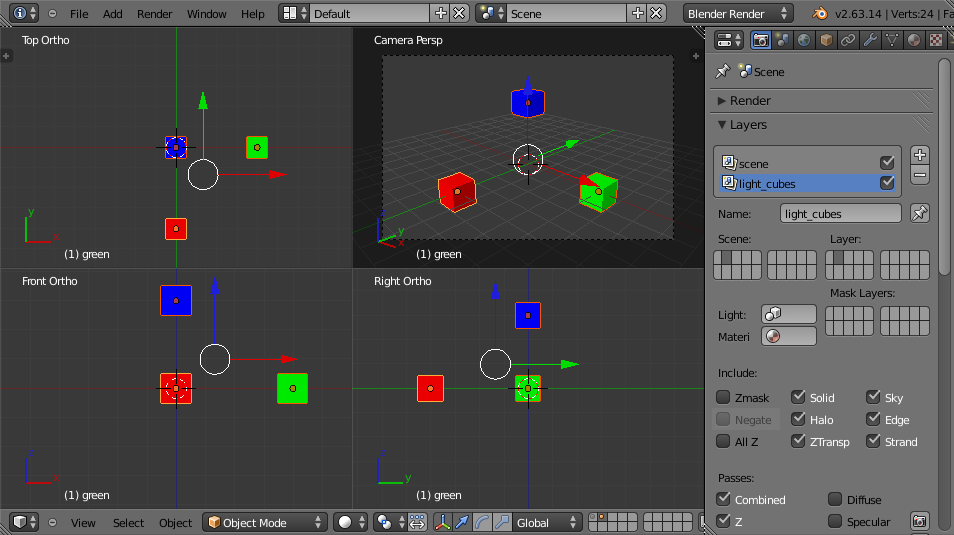
Next, it's necessary to light the scene with real lights. Because the aim
is to model small cubes that emit light, ideally the light sources should be
placed inside the cubes. The obvious problem with this approach is that the
cubes will not allow light to escape from inside of them. The simplest solution
to this problem is to place the small light cubes onto a different layer, and
configure the individual lights to only affect objects on their own layer. Two
layers are created, and the cubes are distributed between them:

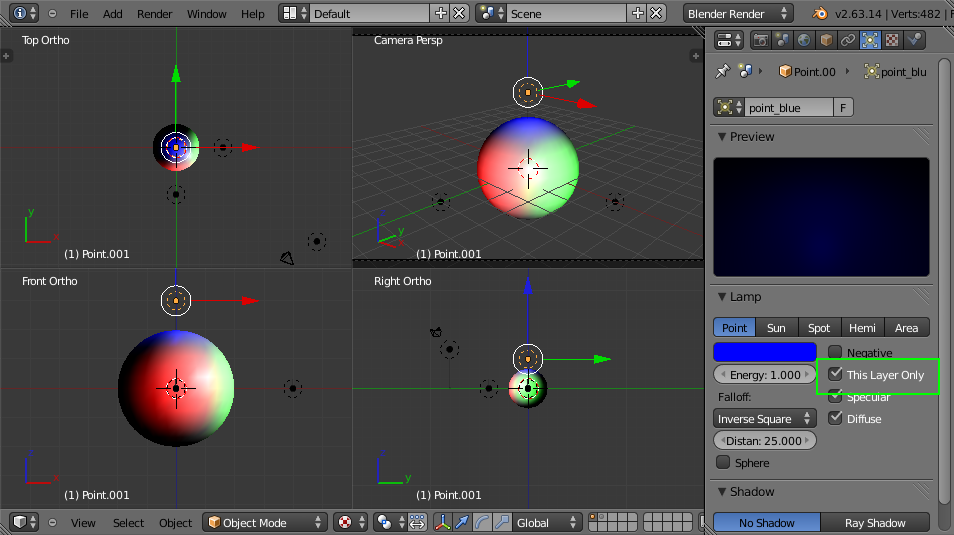
Next, point lights are created on the same layer as the sphere, and each
individual light is configured to affect only that layer:
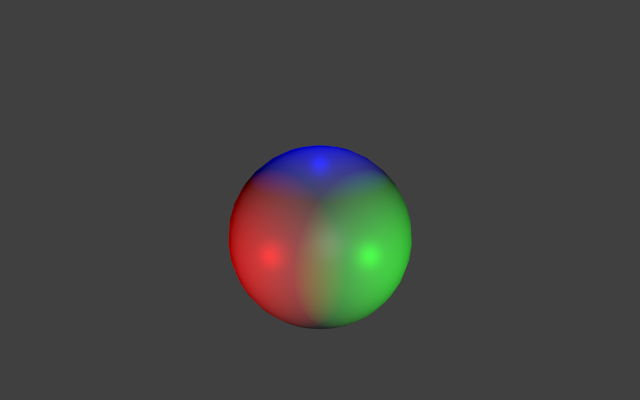
Rendering the scene (with the layer containing the light cubes disabled) shows
the effect of the point lights:
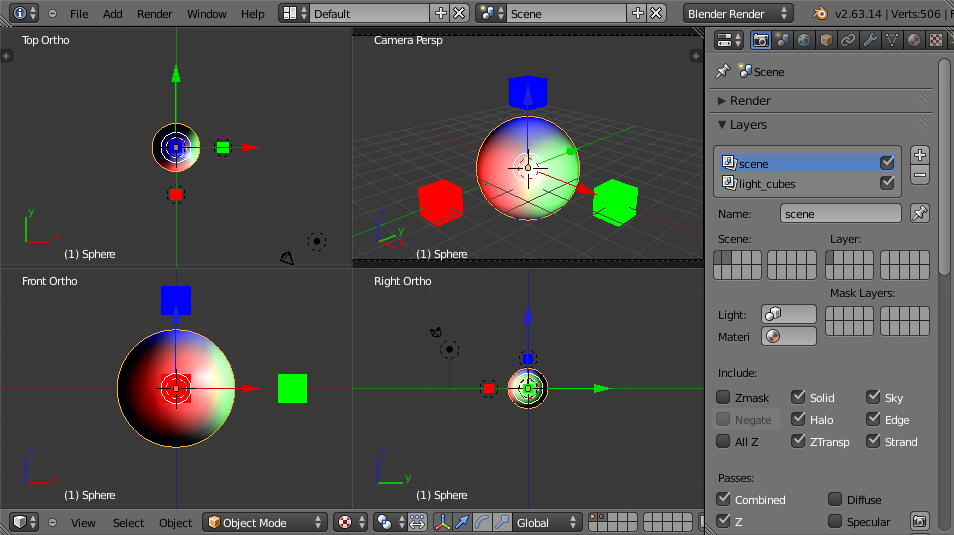
The overview of the current scene:
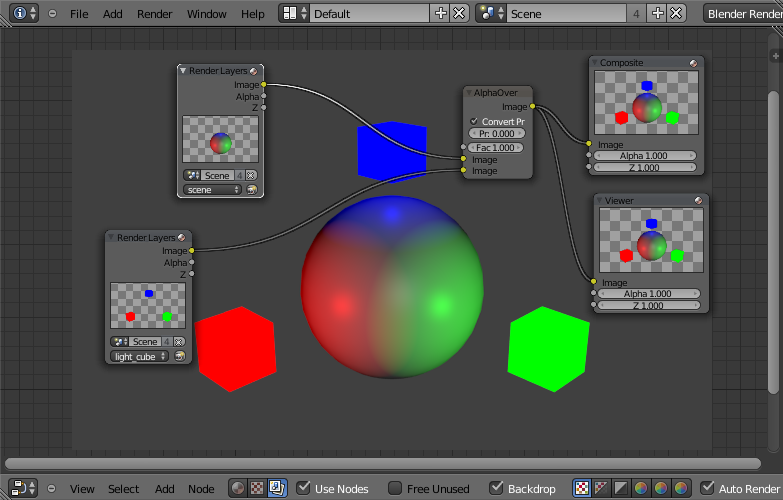
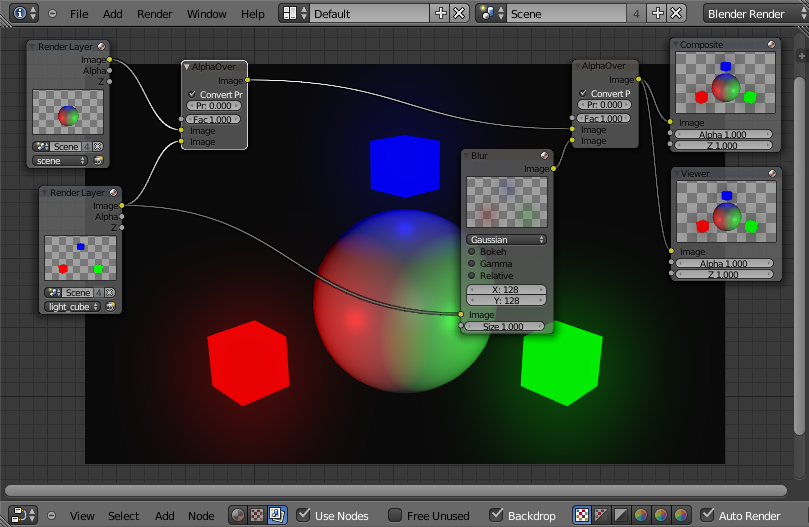
Now that the scene is split into layers, it's necessary to use Blender's
compositing pipeline the combine the layers into the final image. Switching
to the Node Editor and combining the two
images using simple alpha compositing gives the expected result:
Glow mapping
A glow map can be thought of as a blurred
copy of the light sources in the scene. Producing the map is trivial and
simply involves passing the layer containing the light cubes through a
gaussian blur filter:
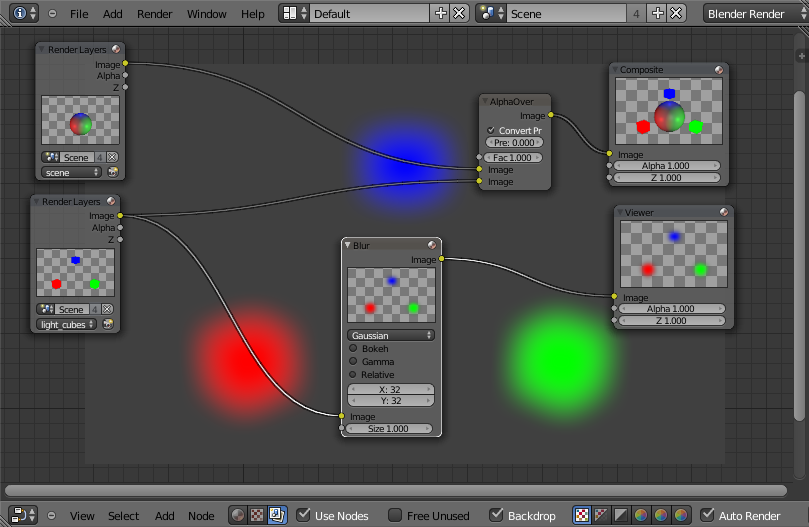
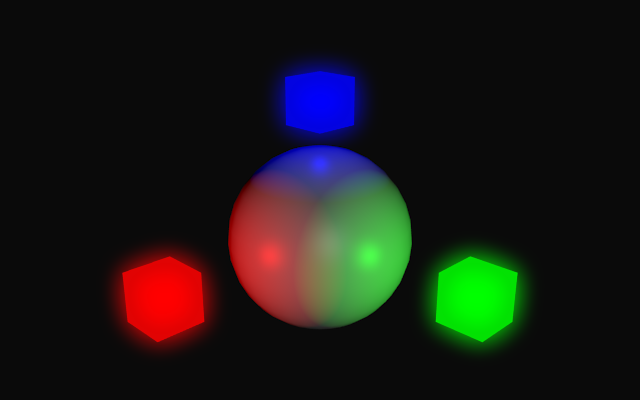
The blurred layer is then composed with the original image:
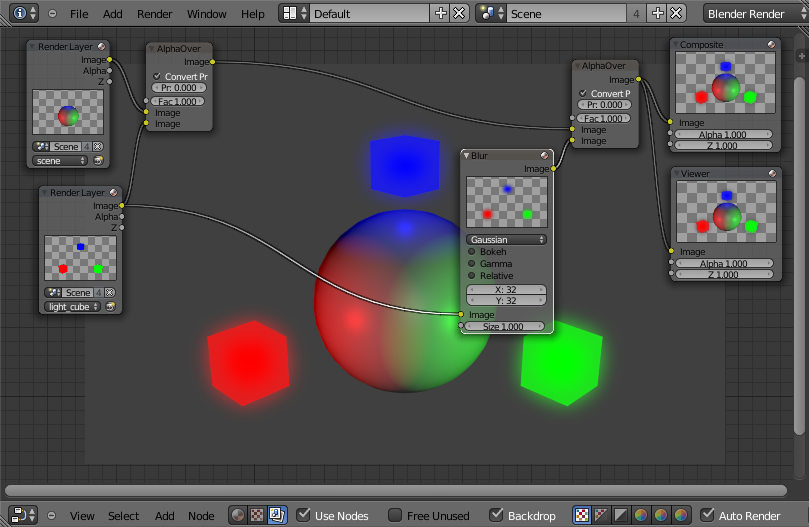
Note that a darker background makes the effect more prominent:
A larger blur radius gives the effect of a dustier atmosphere:
See the completed Blender project file
for the implementation described here.
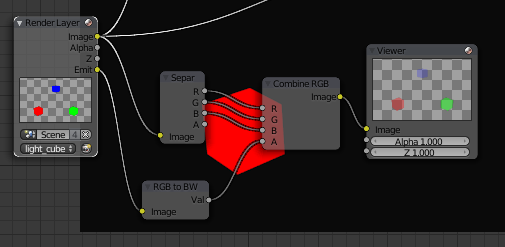
Alternate implementation
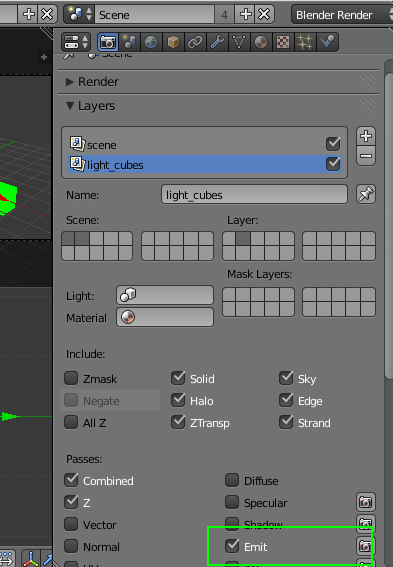
It's also possible to avoid the use of multiple layers by asking Blender
separate out the emissive parts of the image. The emissive sections are
then processed as before. Emissive data can be added to the rendered image
by selecting the 'Emit' option in the layer settings:
The emissive data then becomes available as a channel in the relevant
render layer:
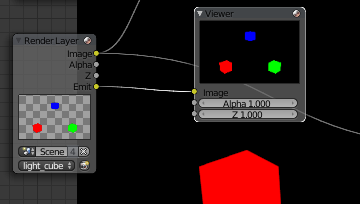
The downside of this approach is that the emissive data has no alpha
channel. It's necessary to synthesize an alpha channel using a greyscale
copy of the data: